Firstly, always blame your tools. Its not You, its Them. Secondly, remember that in this case, the tools are Pencils, Sharpener AND Paper Surface, not just Pencil. A couple of years ago I decided to use only Light-Fast colour pencils, and my Brand-Nightmare began, so I really so know how awful it is when the pencils won't go down as you want them - and I'd been using pencil successfully for 25 YEARS, already..!! Yikes. (that's since before I was born, obviously)
I tried many brands and some remained useless as far as achieving strong, dense, rich colour. Some were grainy - I wanted smooth and line-free. Some only accepted 3 layers of colour, when I wanted...the option of just one or two more, if it NEEDED it. Also, I was using Extra Smooth Bristol paper - Bristol paper is a gorgeous surface for colour pencil, after the initial shock of how slippy it feels. But Extra Smooth is going too far, so I ditched that and use Bristol, without the Extra. I also ditched the idea of using only 1 brand of pencil, and mixed them up, according to colour.Doing this actually had the fantastic bonus of a new Palette of colours, especially for skin tones, rather than restricting myself to the one brand. I also keep my pencils really sharp (= cocktail stick sharp!).
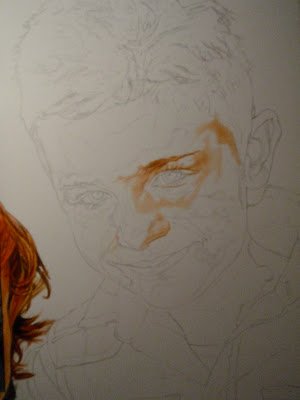
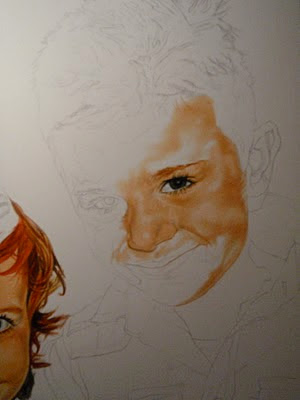
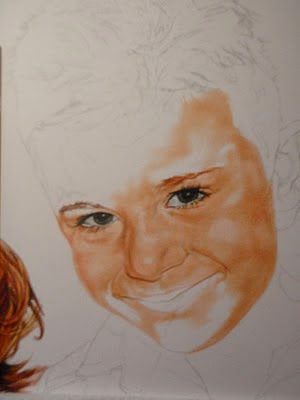
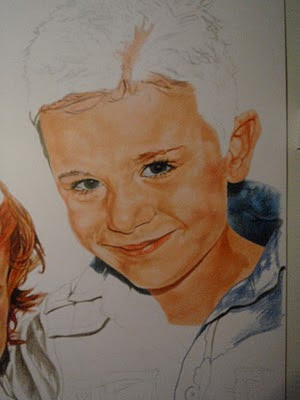
Next thing is to know that everyone has a different way of working, everyones Process varies a bit, so if you get lots of advice which is contradictory, don't worry, they're all right! I personally try to do as few layers as possible, because it is slow enough as a medium without dragging it out longer than necessary. I also don't do an all-over base layer, though MANY do. I just get fed up going over and over the whole page that way, and prefer to do small areas at a time, but completing them as I go. The very important thing about working this way is to creep along the page till you're finished, and not flit from one area to another or it feels like the spots you've done will never join up!
As far as pressure, there's a long way between pressing Lightly and pressing Too Hard. Get some Bristol paper and draw some 1 inch squares and practice filling them in using different techniques- lots of light layers in 2 or 3 colours, try mid-pressure layering and leave the heaviest pressure till the end. Trial and error in small little boxes, rather than on something that you have carefully drawn out.
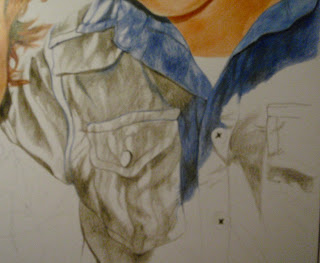
These images show some of the stages on a recent artwork using Colour Pencil. It was mostly Caran d'Ache (water soluble hard ones, but no water added) plus the Luminance range, which is expensive, but you're Worth It (it includes a good range of Dingy, non-colours, far more useful than Brights), and Derwent Artist. (The colour difference between images is purely because the photos were taken at different times of the day and night, but it shows the stages). The full artwork was A3 size and it took 60 HOURS to complete. Sheesh...! And yes, I rub out my initial line drawing as I go along. And no, I did NOT use a grid. So you shouldn't either... Copyright on this drawing (and on all portraits) belongs to the sitter, please do not copy or print this in any form. I also use on pencils, no smudging, no brandishing tools, just pencils.
Next up: Two day Big Drawing for Distance Learning, Belfast. 5th & 6th March.
Email julie@juliedouglas.co.uk for details.
BIG NOTE.... I really love teaching. Not everyone can say that. If I can help you in any way it would be an honour to do that. Just ask me a question. But I know that you will not learn anything by copying my work. Not a thing. So please do not do it. Don't print out my images, don't try to draw them, for the copyright is mine and you don't have my permission to do it. Thank you. Rest assured I will never, ever try to copy anything that you have created.


More very good information, particularly for beginners. The practice exercise with the squares will definitely help me to see where I am going with colours. I would worry a bit about breaking up large areas using similar colours, because I would probably change my pressure between bits and get different results, but no doubt lots of practice would take care of that risk.
ReplyDeleteah Hilary, when you start to worry, the thing to do is take a MUCH BIGGER BREATH, and DO IT ANYWAY ... This has the added bonus of helping you to stay under water longer when you're on your next painting holiday in the Bahamas. Aren't I the most sympathetic teacher..?
ReplyDelete